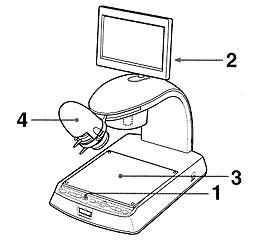
| 1 | Make sure that the video signal from the CCD camera is selected. |
| 2 | Adjust the angle of the LCD monitor to suit your work position. |
| 3 | Place the supplied table on the base plate and place the object on top of the table. |
| 4 | Slide the ZOOM, FOCUS and IRIS levers on the camera section to adjust the image on the LCD monitor. |
Camera Lens Section
 |
16 Lens filter A filter exclusively made for this unit to protect the lens. 17 FOCUS lever 18 CENTER ADJUSTER control |
| 19 ZOOM lever Adjusts the zoom level. Slide the lever to the right to zoom in. Slide it to the left to zoom out. 20 IRIS lever |
|
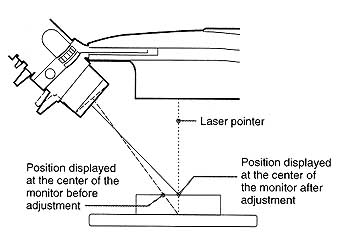
Objects with different heights
| Due to different heights of objects, the center of the viewing area (i.e. the position of the red laser dot) may not correspond exactly with the center of the monitor after replacing objects.
In this case, rotate the CENTER ADJUSTER control until the red dot is in the center of the monitor. |
 |
To change the viewing angle
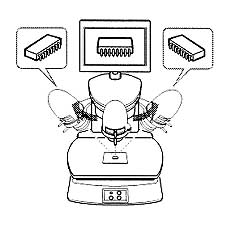 |
Slide the camera section along the groove to change the camera position. The camera can be moved up to 45 degrees either to the left or right of center. The view of subject changes with the position of the camera, as shown in the illustration left. |